| View previous topic :: View next topic |
| Author |
Message |
Commodore
Ladies Man


Joined: 20 Jun 2005
Posts: 11636
|
 Posted: Jun 22, 2009 6:46 am Post subject: Refitting, repairing, and upgrading a trailer. Long read. Posted: Jun 22, 2009 6:46 am Post subject: Refitting, repairing, and upgrading a trailer. Long read. |
 |
|
I know this is a DIY project, but since so many people come in here instead of DIY looking for boat information, and many of the boats now don't have trailers. I figured this would be a good place for those to learn about when they find a trailer, and what it takes to make it work for you and your boat.
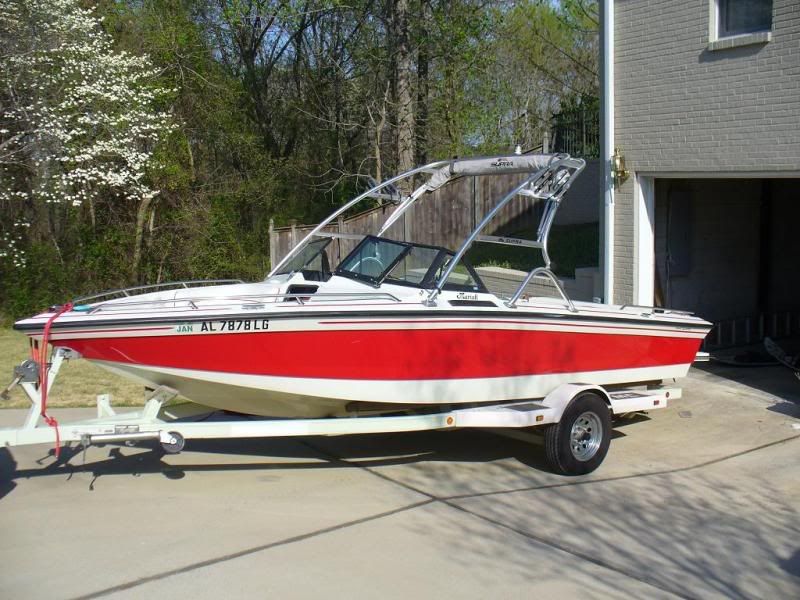
My boat is a 1990 Supra Mariah, it's about 20' long. My trailer was for a Mastercraft 180. Just over 18' long. The Supra is also 4" wider overall, and has a deeper keel.
This trailer is what came with the boat, so instead of forking out a couple thousand for a custom new trailer I tried finding an old Supra trailer, or one that would fit. No luck.
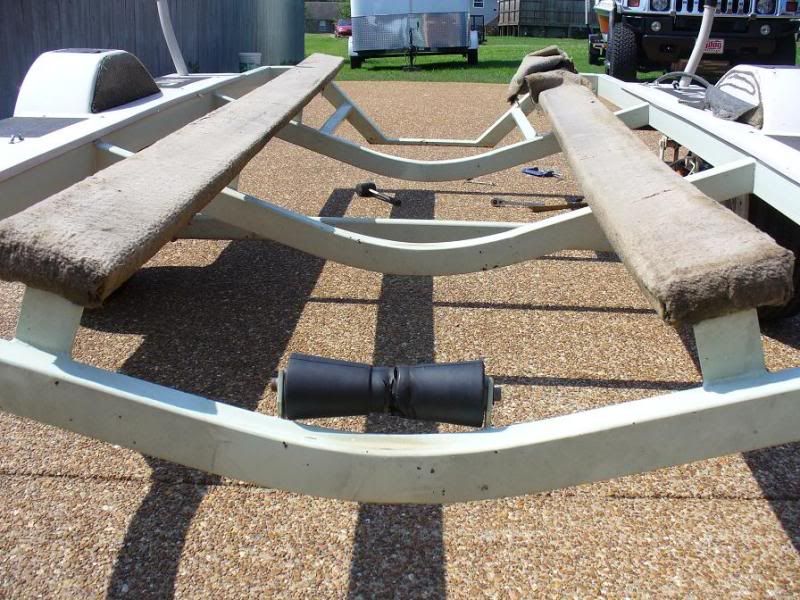
Now, the problem with my trailer is age and fit. The Supra was riding along the emergency roller. This is a roller in the center of the trailer which is designed to be a safeguard when loading and unloading the boat. It's there to make sure the boat doesn't hit the trailer. Not support it. Well my keel was riding so hard on it, it actually cut through the roller.
My plan was to redo the whole trailer by doing a few things:
1) Raise the bunks to make the boat clear the center roller.
2) Adjust the bow rise to actually touch the boat and help support the bow instead of just resting on the front bow roller. This also helps push the bow up to go over the bow roller, instead of under, and do damage.
3)New carpet and new wood bunks.
4) New paint to match the boat and make it look like Supra Factory
5) New lights for better visibility.
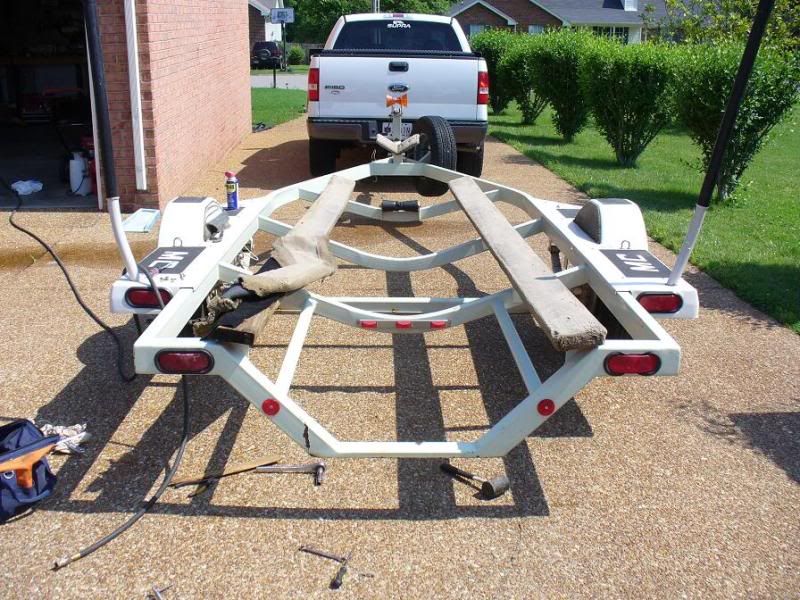
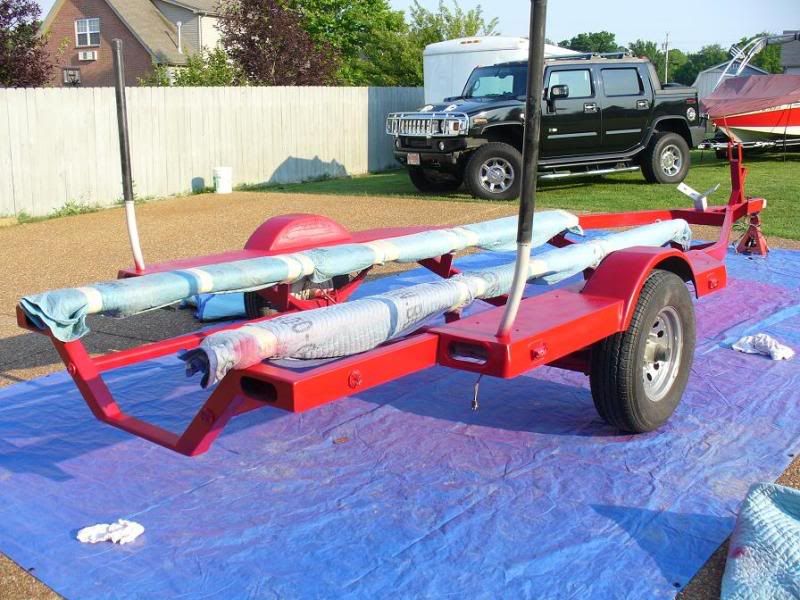
So lets start with what we have:
As you can see, the bow riser doesn't even touch the boat. The color looks terrible. And overall the trailer just looks awful. You can almost see the keel riding on the roller. There are also MC and mastercraft logos all over it.
Well that had to go. So the first thing we did is get the boat off the trailer. This is easily done if you have a friend with a trailer and his boat is in the water all the time. If not, pick a weekend to do this (that's all it took me) and put it a friends dock, or marina for two days.
Now that we have the boat off the trailer, the first thing I needed to do was work on the bunks and carpet. If I can't get the bunks high enough to clear the roller, there was no point in going any further. Then I'd have to buy a custom trailer. I took 3/8 and 5/16 thick flat steel. I cut them to match the mounting points on the bunks. I then drilled two holes to match up with the mounting holes. These are basically adding a small bit of lift to the bunks. The bunks are not adjustable, they are welded in. Cutting and rewelding would have been a nightmare to get right. Adjustable bunks can't handle the load of these boats.
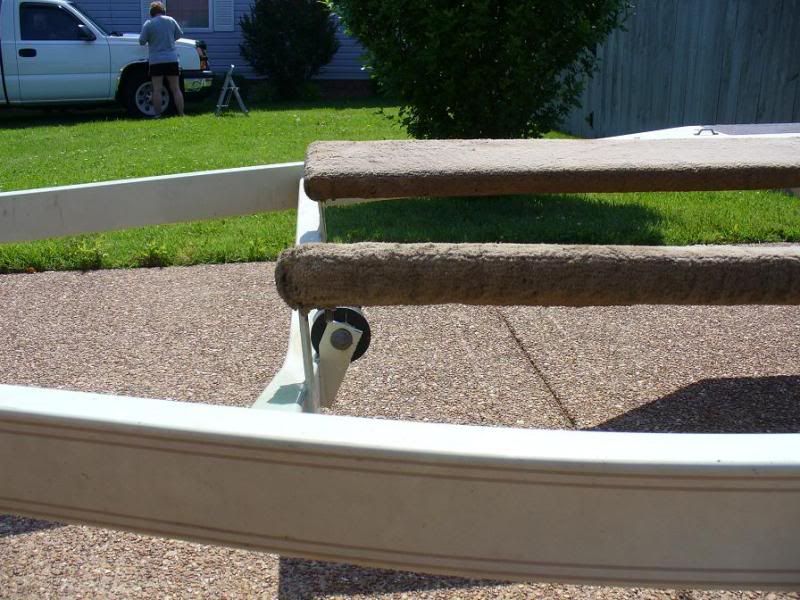
As you can see here, the roller is mangled. And the bunks are sagging.
Once I had cut my steel pieces I had to remove the bunks. They are secured by carriage bolts going through it. With carpet stapled on top. So you must remove the old carpet before removing the wood.
Be careful as even though they are stainless steel staples, they will still have surface rust on them.

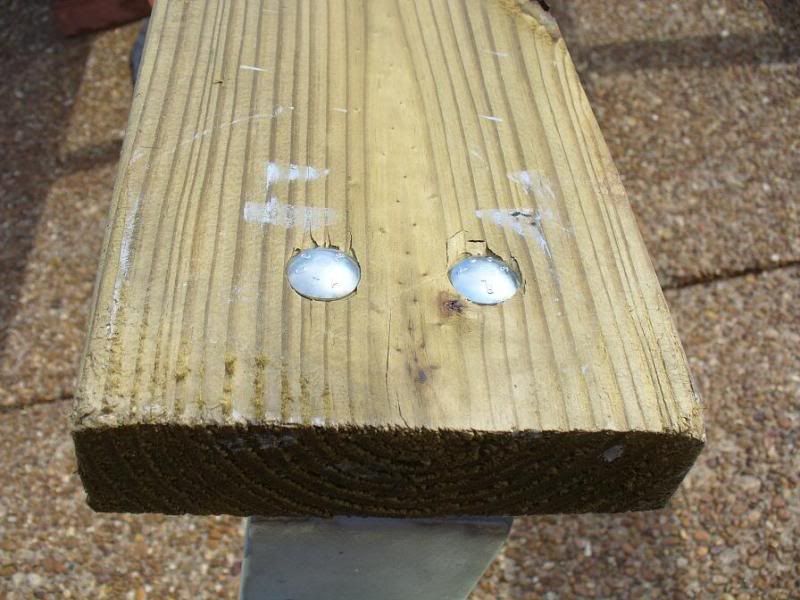
Once you have the carpet off, you can see if you need to replace the wood. As I figured, I did. It was $14 total at Lowes for two 12 foot pressure treated pieces of 2x6. Worth it. I aligned up my wood and marked for my holes. I then had new bolts and drilled my holes. Make sure you are precise here. If you miss you can't wallow open the holes to line up with the trailer. Then the carriage bolts won't hold. When bolting the carriage bolts down, you want to crank them down so the head sinks into the wood, but not much. They are going to stick up just a tad above the wood. Too much, and you'll start to crack the wood.
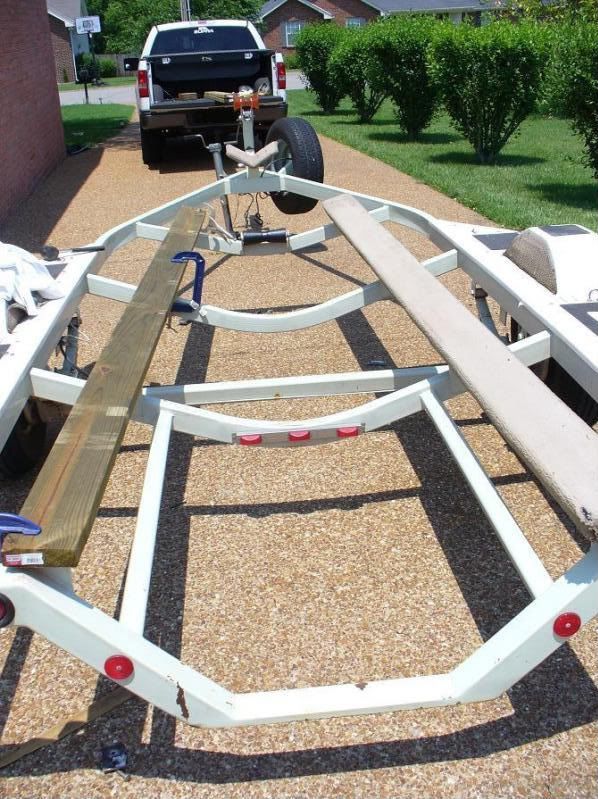
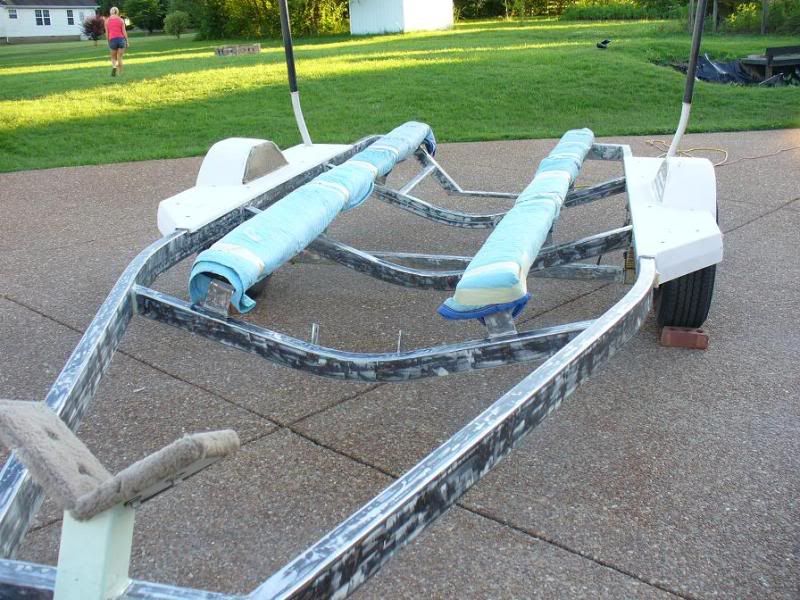
I placed my wood down, bolted them into place with all new stainless hardware. With the lift blocks and new wood, they fit perfectly. It all aligned just right, and tight. Now comes the carpet.
You can buy carpet at most marine stores. DO NOT GO to West Marine unless you plan on paying $100 for $30 carpet. Here we have a Bass Pro Shop. Carpet that is 14" wide, and 12' long. Perfect. We trimmed the sides down to fit. You want to make the carpet wrap around the bunk, but leaving about an 1" to 2" open underneath. This helps the carpet and wood to be able to breath and dry properly, extending the life of the wood and carpet.
Now, the carpet from BPS is much more thin than the previous mat. Since the carpet on ours was still intact, just ugly as hell, we used it underneath the new carpet. This provided a thicker padding to protect the hull against the carriage bolts. We cut the bottom pad to fit just on top of the bunks, not wrap all the way around. We then used a staple gun to secure it down. Then comes to the main carpet. You want to tuck and roll it at one end, and work your way towards the other. Basically you cut and fold the sides in, and then roll the excess over the sides and under. This give the end of the bunk a clean look. You then work slowly towards the other end, checking alignment and tightness. You want it tight, but not drawn too tight. You will use hundreds of staples in this process. There is no thing as too many. They will all be underneath so you won't see them.
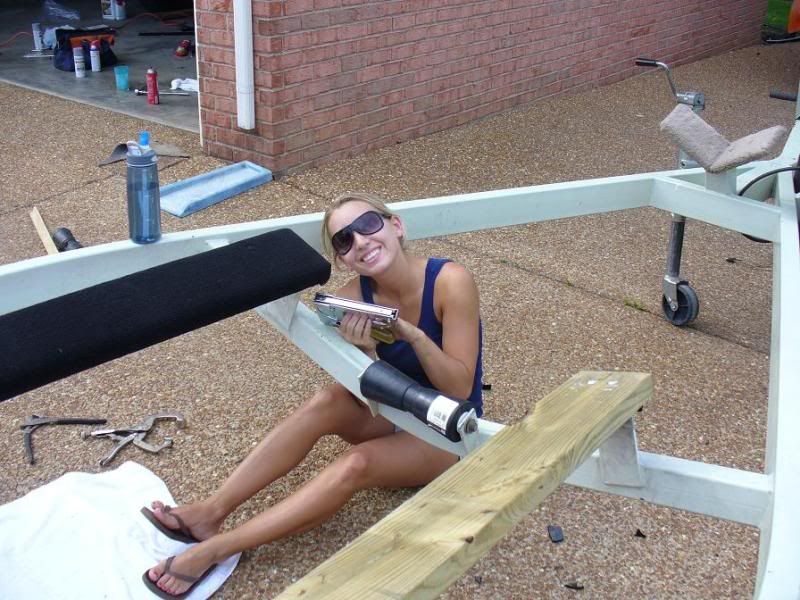
When you're done it should look like this:
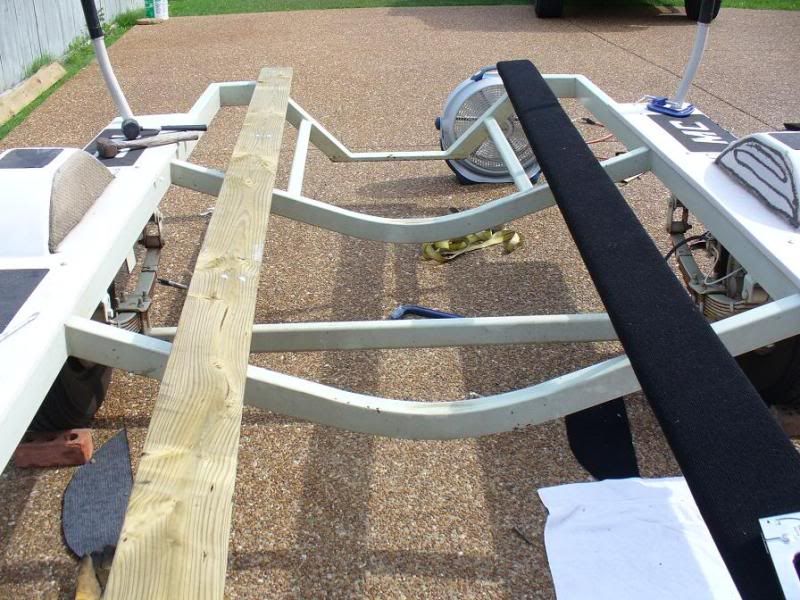
Helps if you have a wife who loves the staple gun for some reason.
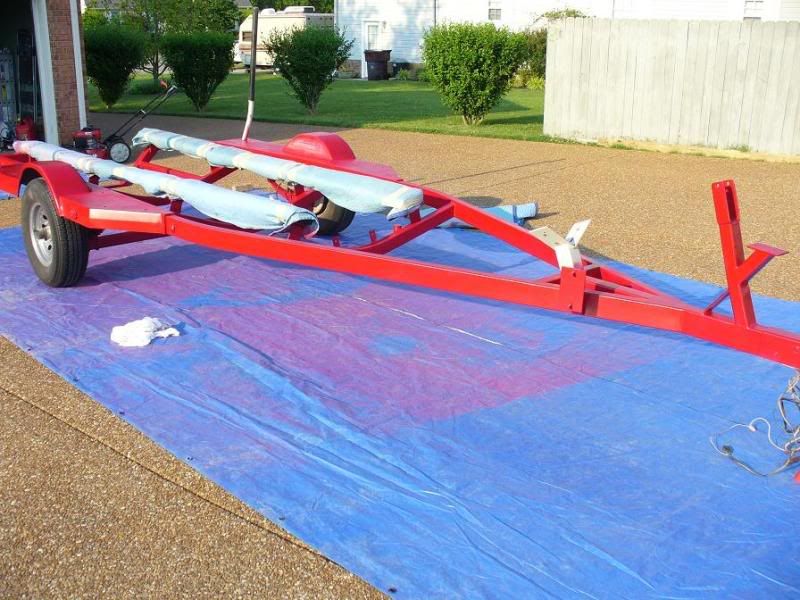
Now that we have the bunks done, it's time to give this sucker a face lift, hell a new face period.
This paint was not only faded and ugly, it was rusting in some spots. So time to remove it all, clean it, and put a fresh coat. There is no way to do this properly without removing the old first. You can paint over it, but it won't last, and probably won't look as good.
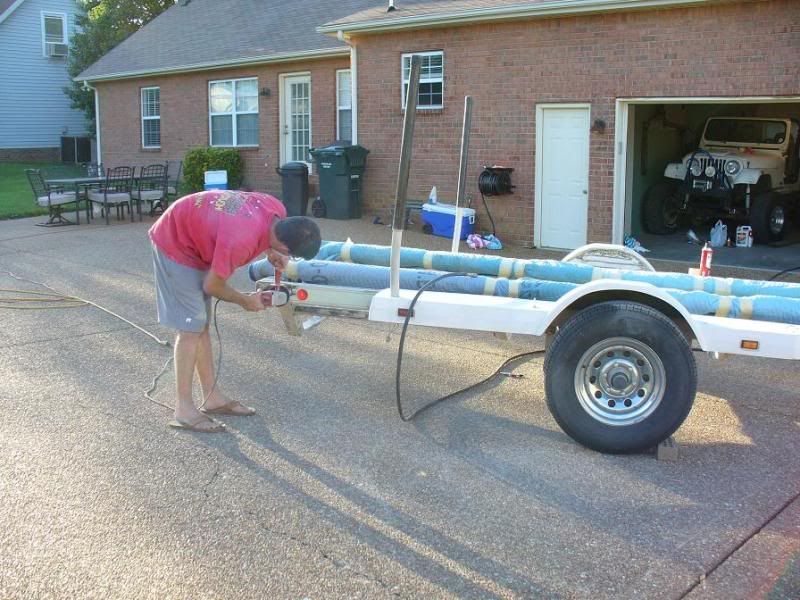
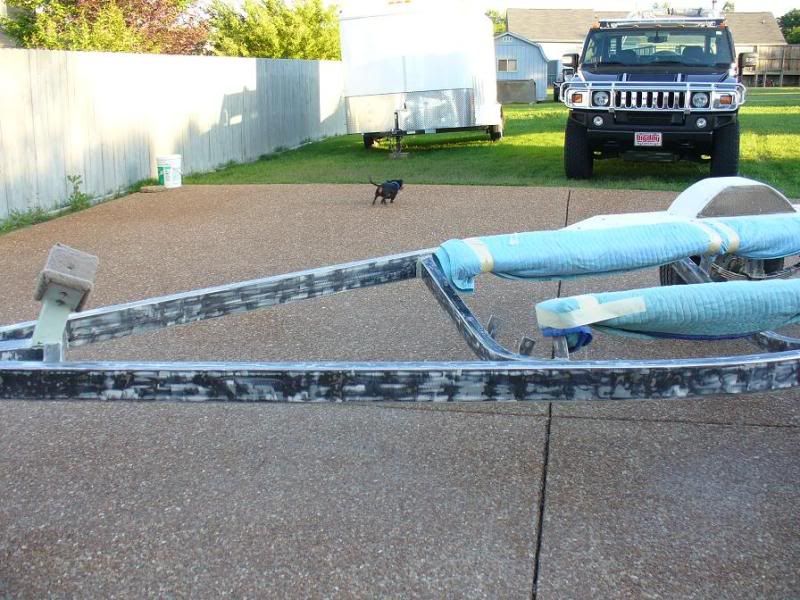
Time for the angle grinder and an 80-grit sanding disc. Lots of them.
I basically worked my way down the whole trailer removing any paint and rust. It should be bare metal when you are done. Remove everthing, and cover anything you can't.
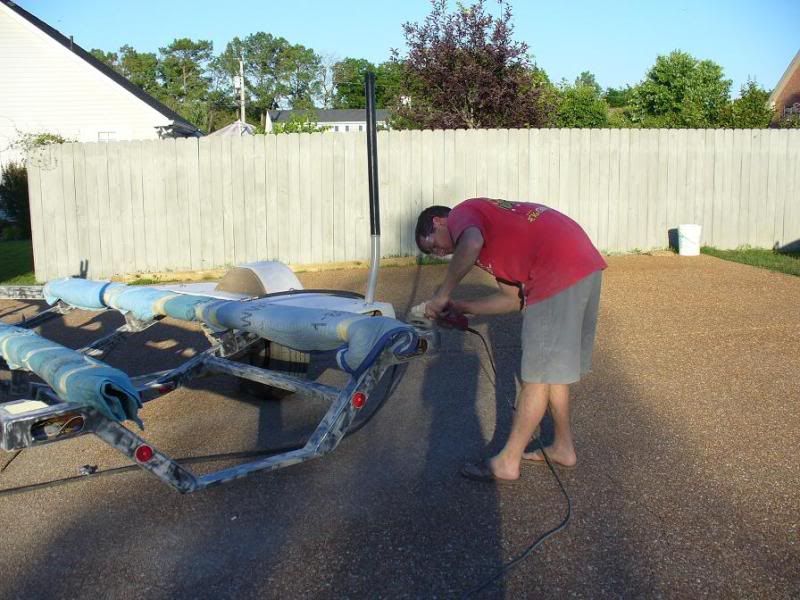
SIDE BAR: As you can see, the bow rise has not been touched. The reason is this whole piece will be cut, and welded with new steel at the end. But with the boat on it to measure it out. I have no pictures of this.
The fenders and step sides are fiberglass. I used an air powered orbital sander with 120 grit, and then went to 500 grit. I removed all the hardware, and pulled off the crappy traction pads.
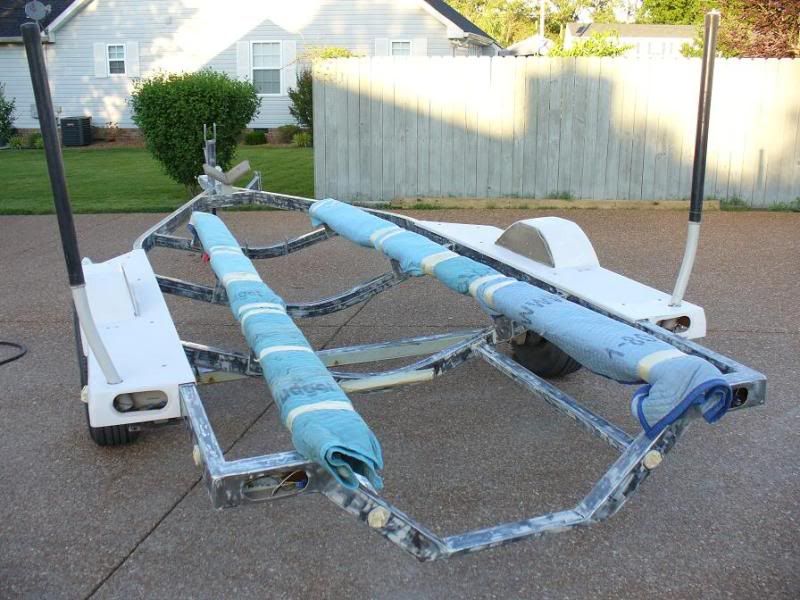
Now it's time to primer it. I used rustoleum primer to protect it. And it dries really fast.
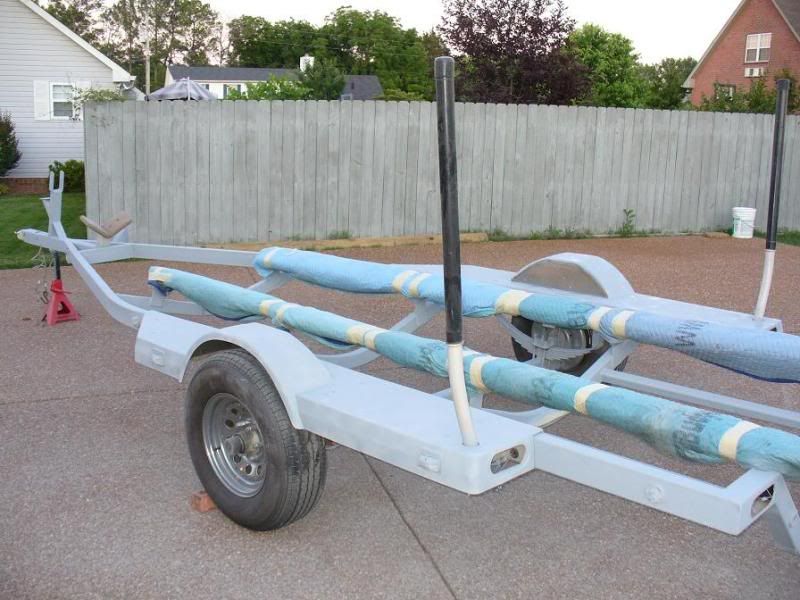
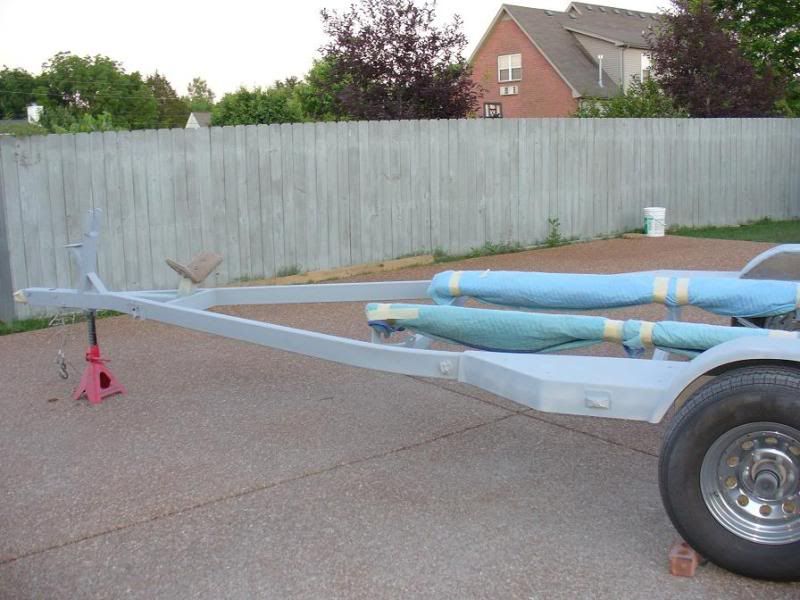
Next came paint. I went with a traditional spray paint from an automotive chain. Next time I will go with a thicker laquer mix. As this looks great, and is somewhat durable. It still can scratch rather easily. Not a good thing for a trailer.
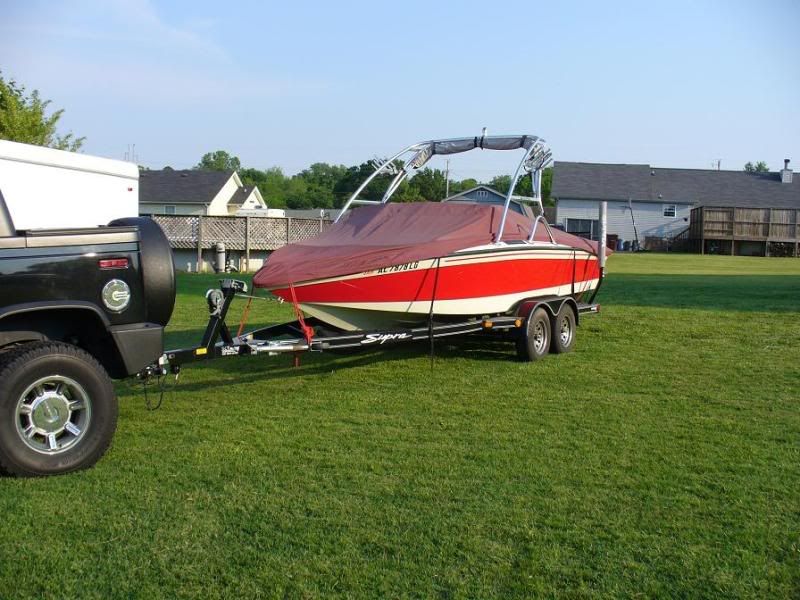
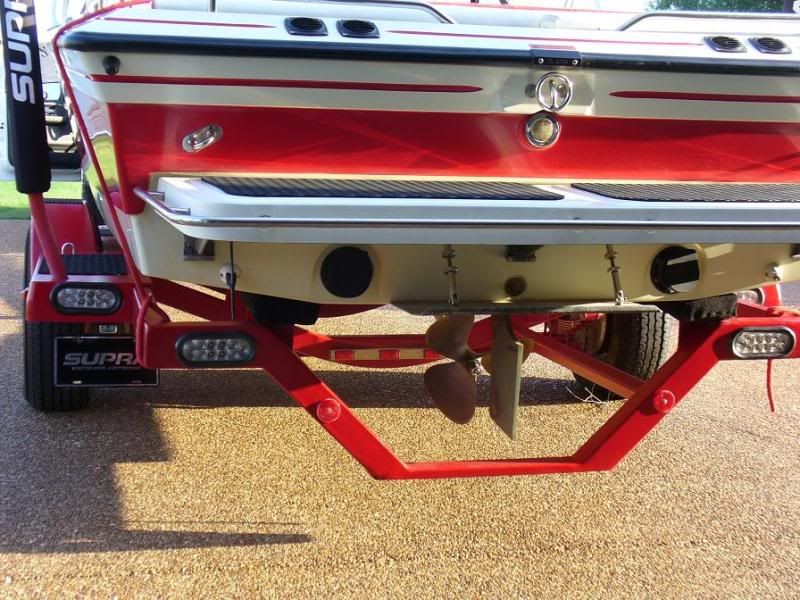
After I finished painting it all up, and then fixing the bow rise with new 3x3 steel at 9.5" high and new carpet. The boat was on it. I then put in new LED tail/stop lights. They are very bright and do a great job. I went with clear lenses because of the red trailer. Not only does it stand out and look cool. But because they stand out, when they go from clear to read, you know it. And makes it that much more visible behind me. I also added a few small Supra decals on the boat to help. As well as new trailer guide covers. I also polished the chrome rims with the Mother's powerball and chrome polish.
I then called up Hydroturf, and got some of the b-side traction pads. B-side means they have some sort of defect, which I couldn't find, but is cheaper. Add the 3M adhesive, and all you have to do is cut, and stick. Now I have real padded traction points that actually help on the trailer. A new black winch and strap add to the theme black and red. The final thing will be the spare tire gets a treatment of black or red paint.
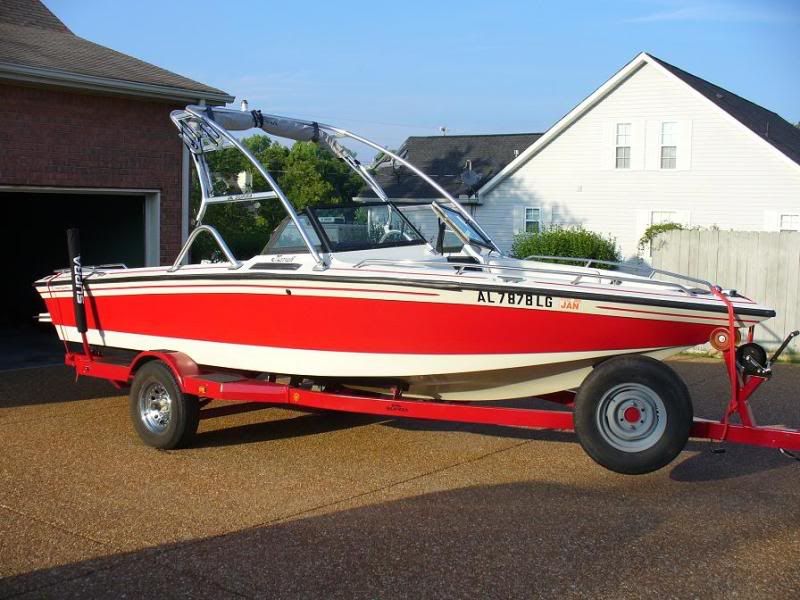
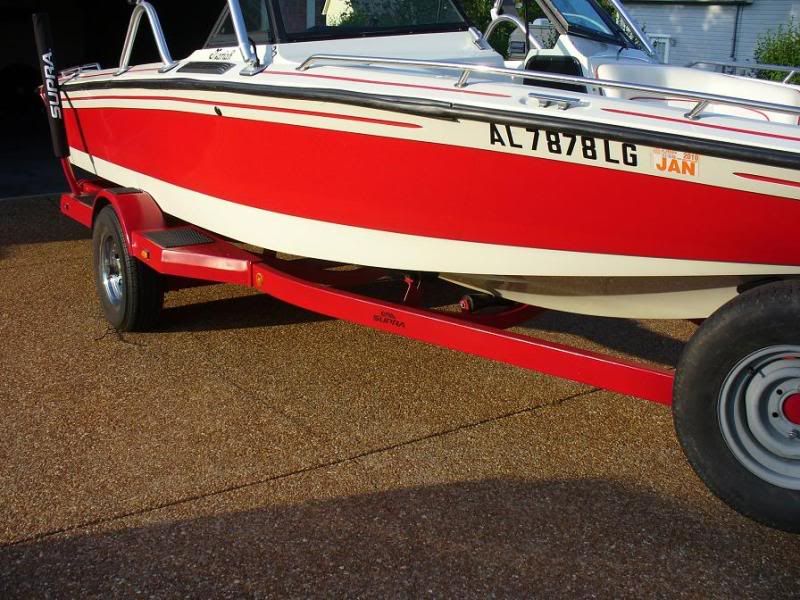
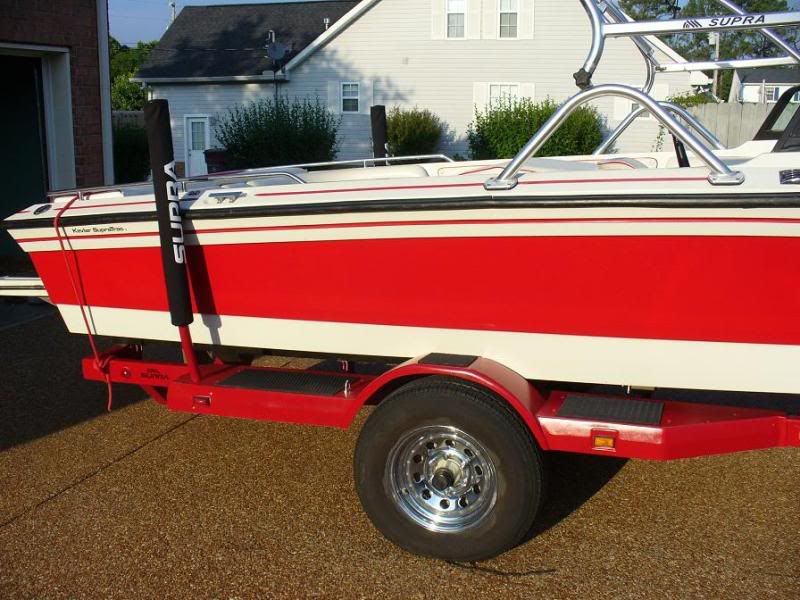
I can't tell you how much better the boat looks sitting on this trailer now. It really does help the overall look. The boat clears the roller on the keel by 1/4 of an inch perfect. I didn't want to raise it too much. The boat fits the trailer now, and matches it. And because I didn't go too high, it still fits in my garage.
 |
|
| Back to top |
|
 |
|
|
Wakebrad
Ladies Man

Joined: 11 Dec 2003
Posts: 12257
City: Dallas
|
| Posted: Jun 22, 2009 7:17 am Post subject: |
|
|
Nice! Looks great man. Where was your boat this whole time?
The trailer on my old Sport looked like a POS, but it was galvanized so from a protection standpoint there was no need to re-do it.
The roller in front is a good idea. Boat buddy would have been nice there also.
_________________
You have just entered the twilight zone. |
|
| Back to top |
|
|
Commodore
Ladies Man
Joined: 20 Jun 2005
Posts: 11636
|
| Posted: Jun 22, 2009 7:32 am Post subject: |
|
|
Wakebrad, it's on my buddies trailer. It's in the thread. Black trailer.
Look at the first pic. I had a boat buddy, and it was hell. Not only did it not work, it left a gray residue all over the boat. And if I didn't have the trailer just right, the boat would go under it. The roller allows me to bump it and roll up on it. And it comes off the trailer easier. I will never have a boat buddy again. |
|
| Back to top |
|
|
vette74
Wakeboarder.Commie


Joined: 30 Jul 2003
Posts: 2144
City: Houston
|
| Posted: Jun 22, 2009 7:51 am Post subject: |
|
|
Nice work. My trailer needs to be done also but I'll probably upgrade boats by the time I get around to it.
_________________
There'll be two dates on your tombstone/ And all your friends will read 'em/ But all that's gonna matter is that little dash between 'em... |
|
| Back to top |
|
|
Wakebrad
Ladies Man
Joined: 11 Dec 2003
Posts: 12257
City: Dallas
|
| Posted: Jun 22, 2009 8:03 am Post subject: |
|
|
haugy, ah, that's what I get for skimming.
Yeah, you do have to have the BB setup perfectly. I've seen them work flawlessly on some boats and nightmares on others. I have been less than impressed with Supra trailers thus far. They just don't seem to be configured very well for the boats. Both of the Supras I ride on regularly, the owners have had problems with them. On the 24SSV he used to have to fill the rear ballast tanks to get the nose out of the water enough to get it over the BB. Both got gouged by the BB from sliding under it when not getting the conditions perfect.
_________________
You have just entered the twilight zone. |
|
| Back to top |
|
|
Okie Boarder
Ladies Man

Joined: 03 Mar 2008
Posts: 10056
City: Edmond
|
| Posted: Jun 22, 2009 10:39 am Post subject: |
|
|
Looks really good haugy! Great job and great write up!
_________________
If love is blind, why is lingerie so popular? |
|
| Back to top |
|
|
chavez
Ladies Man

Joined: 22 Sep 2003
Posts: 27375
City: Roseville
|
| Posted: Jun 22, 2009 12:01 pm Post subject: |
|
|
Nice re-do E. Even better writeup on it!
_________________
| Quote: | | That's Mr. Gingermex to you a$$hole. |
RIP MHL 04/25/1958 - 01/11/2006 |
|
| Back to top |
|
|
DRAGON88
Ladies Man

Joined: 12 Jan 2003
Posts: 8213
City: Portland, OR
|
| Posted: Jun 22, 2009 5:27 pm Post subject: |
|
|
Looks awesome, although I have some fond memories (memory) of the way it used to be...
I bet you wouldn't let me back in anymore. 
_________________
wakeboards
wakeboarding |
|
| Back to top |
|
|
Rhawn
Wakeboarder.com Freak


Joined: 14 Jun 2006
Posts: 3127
City: Richmond, V to the Izzay
|
| Posted: Jun 22, 2009 5:36 pm Post subject: |
|
|
| Good job, looks great. |
|
| Back to top |
|
|
Chattwake
Wakeboarder.com Freak

Joined: 01 Jul 2005
Posts: 4064
City: Chattanooga
|
| Posted: Jun 22, 2009 5:41 pm Post subject: |
|
|
Wow Haugy! Awsome job. I'm impressed.
Did you put any clearcoat on that trailer? BTW, I bought some of that hydroturf bside for my standup. The 3m coated stuff didn't stay on as well as I wanted it to. If your turf starts to come off at some point, go get some contact cement, a heat gun, and a rubber mallet. Using contact cement I haven't had any turf come off at all, and I abuse my ski.
Hopefully I can see it in person at Wake Bash! |
|
| Back to top |
|
|
ridininmd
Wakeboarder.Commie

Joined: 16 Feb 2006
Posts: 1231
|
| Posted: Jun 22, 2009 6:04 pm Post subject: |
|
|
| Looks great. One question though, why not drill the bunks to countersink the carriage bolt heads? |
|
| Back to top |
|
|
jonyb
Addict


Joined: 06 Oct 2007
Posts: 844
City: Paducah
|
| Posted: Jun 22, 2009 6:29 pm Post subject: |
|
|
| Trailer looks pretty good in person.... With some bright freakin lights! |
|
| Back to top |
|
|
Commodore
Ladies Man
Joined: 20 Jun 2005
Posts: 11636
|
| Posted: Jun 23, 2009 4:59 am Post subject: |
|
|
DRAGON88, as long as you aren't backing it into the water this time you can come.
02lightning, 2 coats of clear, forgot to put that. As for the traction pads, I put a little marine adhesive along the edges, just in case. See ya in Aug.
ridininmd, if you drill open the holes, the carriage bolts won't hold well. If they get any movement they'll work themselves open over time. And if you go to deep with the heads, the wood cracks at the ends causing a potential split once the boat is on it. BAD. |
|
| Back to top |
|
|
JeffreyCH
Wakeboarder.Commie

Joined: 11 Aug 2008
Posts: 2205
City: Lincoln
|
| Posted: Jun 23, 2009 5:10 am Post subject: |
|
|
Damn that turned out great, looks 1000x better. Nice write up on the rebuild, but can we get the rest of the story (D88 backing the trailer?)
_________________
| _bruky wrote: | | 99 problems but wisdom ain't one. |
|
|
| Back to top |
|
|
STANG KILLA SS
Wakeboarder.Commie

Joined: 16 Feb 2008
Posts: 2086
City: Killeen TX
|
| Posted: Jun 23, 2009 5:55 am Post subject: |
|
|
amazing restoration. very well done.
any more info/pics on the CJ?
_________________
 |
|
| Back to top |
|
|
dirtysparks
Wakeboarder.Commie
Joined: 07 Jul 2004
Posts: 2428
|
| Posted: Jun 23, 2009 7:26 am Post subject: |
|
|
| Quote: |
Helps if you have a wife who loves the staple gun for some reason. |
Is that what she calls it?
ZING!
Nice work though, looks 100% better. Do you have tracking fins on your boat? Looks like it would be pretty tight if you do. I'm surprised you took it all the way down to the metal....did you have significant rust showing through? That will last a long time being taken all the way to the metal and primed. |
|
| Back to top |
|
|
Commodore
Ladies Man
Joined: 20 Jun 2005
Posts: 11636
|
| Posted: Jun 23, 2009 9:09 am Post subject: |
|
|
JeffreyCH, ever seen a blind one-armed drunk monkey back up a trailer? No? Call D88 then.
STANG KILLA SS, search
dirtysparks, Yes two tracking fins. And they actually have a couple of inches clearance. Surface rust mainly. But I figured if I'm going to do it, do it right the first time. You can see spots in the before pics. But nothing cancerous. |
|
| Back to top |
|
|
pet575
Wakeboarder.com Freak

Joined: 20 Jun 2006
Posts: 3630
City: Kansas City, MO
|
| Posted: Jun 23, 2009 9:22 am Post subject: |
|
|
Your neighbor is HAWT.
Nice work and nice write-up. Looks sweet.
_________________
| Wakebrad wrote: | | I honestly think it has to do with internet penetration... |
|
|
| Back to top |
|
|
Okie Boarder
Ladies Man
Joined: 03 Mar 2008
Posts: 10056
City: Edmond
|
| Posted: Jun 23, 2009 9:25 am Post subject: |
|
|
By the way, good to see the wife working out there with you. Seems like maybe she does some projects with you just judging this one? My wife is like that and we work on a lot of things together. It's one of the things I really love about her.
_________________
If love is blind, why is lingerie so popular? |
|
| Back to top |
|
|
ctgretzky99
Addict

Joined: 13 Mar 2008
Posts: 938
City: somewhere southwest CT
|
| Posted: Jun 24, 2009 11:56 am Post subject: |
|
|
Looks awesome..great job!
You can countersink carriage bolts, btw. May be safer for others to do so if they put a thinner carpet on the bunks, and possibly over time, not countersinking them could have enough play to stick up a bit.
_________________
One ring to rule them all, one ring to find them. One ring to bring them all, and in the darkness bind them. |
|
| Back to top |
|
|
Commodore
Ladies Man
Joined: 20 Jun 2005
Posts: 11636
|
| Posted: Jun 24, 2009 2:19 pm Post subject: |
|
|
ctgretzky99, yes you can, but since the holes were at the end of the bunks, they will crack and split the bunk. Which would be bad.
I know I tried, and got that dreaded CRAAAAAACK sound and saw the split on the underside. Good thing I bought an extra piece of treated wood. That first one is now scrap pieces. |
|
| Back to top |
|
|
JeffreyCH
Wakeboarder.Commie
Joined: 11 Aug 2008
Posts: 2205
City: Lincoln
|
| Posted: Jun 24, 2009 4:38 pm Post subject: |
|
|
| haugy wrote: | JeffreyCH, ever seen a blind one-armed drunk monkey back up a trailer? No? Call D88 then.
|
Yeah.....me last night lmao.....good thing I throw a tent in the truck for moments like this. Morning was rough waking up in a tent hotter then hell itself, hung over like a mutt, and had to be at work by 8 lol.
_________________
| _bruky wrote: | | 99 problems but wisdom ain't one. |
|
|
| Back to top |
|
|
DRAGON88
Ladies Man
Joined: 12 Jan 2003
Posts: 8213
City: Portland, OR
|
| Posted: Jun 24, 2009 6:07 pm Post subject: |
|
|
| haugy wrote: | | JeffreyCH, ever seen a blind one-armed drunk monkey back up a trailer? No? Call D88 then. |
You didn't even see the parking job I did when I put the trailer away. 
The previous night did not prepare me for such a feat....
_________________
wakeboards
wakeboarding |
|
| Back to top |
|
|
ctgretzky99
Addict
Joined: 13 Mar 2008
Posts: 938
City: somewhere southwest CT
|
| Posted: Jun 25, 2009 5:22 am Post subject: |
|
|
| haugy wrote: | ctgretzky99, yes you can, but since the holes were at the end of the bunks, they will crack and split the bunk. Which would be bad.
I know I tried, and got that dreaded CRAAAAAACK sound and saw the split on the underside. Good thing I bought an extra piece of treated wood. That first one is now scrap pieces. |
Understood looking at the placement of the bolts again.
This was a great write up. If I come across someone looking to redo, Im pointing them to this thread for inspiration and instruction 
_________________
One ring to rule them all, one ring to find them. One ring to bring them all, and in the darkness bind them. |
|
| Back to top |
|
|
|
|
|

